Whilst CAD plans and hand drawings are useful tools in the presentation of interior design schemes and creative ideas 2D graphic expression remains open to a wide range of interpretation both by the observer and the designer. Your client may be an expert in a chosen field but may be flummoxed when required to interpret a series of printed lines on a sheet of A3 paper, supplement this presentation with a 3D model and this will permit the form and space to be fully understood and explored. An architectural model is a communicative device allowing the exploration of spatial ideas.
When embarking on an architectural model pay some attention to its purpose, ask yourself – what is it for and what ideas do you wish to communicate? Do you need to show a large area, an entire building perhaps, a single room within that building or even a smaller joinery component integral to the design? A simple white model can be complemented with the use of mood boards, material samples and swatches, allowing your hand drawings or CAD plans to show the broad overview of the scheme and the use of an architectural model to clarify one of the detailed components. Conversely the model could explore the overall layout with your drawings honing in on the smaller details. You could also make a part-model of a particularly interesting area of the building or construct a sectional model to show the internal spatial organization of an interior space. It’s imperative to start with a clear resolve for your architectural model and then work out what type of model will most effectively achieve your goals. It can be difficult to get the balance right but it is better to be a little less ambitious with the model and focus on submitting a coordinated, fully realized overall presentation.

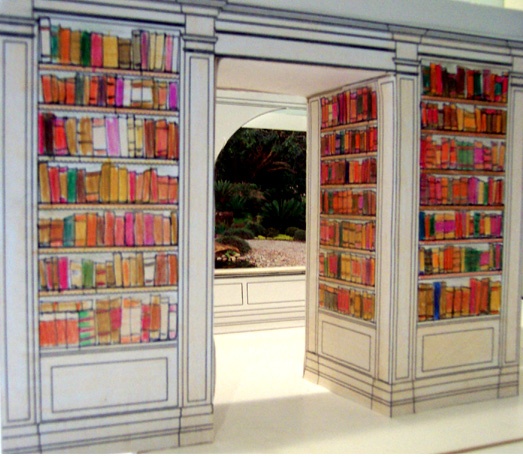
The above image shows a transitional zone within a residential library, this leads the observer into a room (not shown) complete with wainscot panelling, a secret door and a mirrored wall – yes, I did use a small piece of real mirror in the model to clearly indicate the benefits of the design. The model also showed the cut outs for the windows with a superimposed image of the gardens beyond to link the internal space with its external aspect.
The scale of a model is proportionate to the actual size of the real thing. Life size being at a scale of 1:1 ,while a model at a scale of 1:20 scale would be one twentieth of actual size. Likewise, 1:100 would be one hundredth of actual size, and so on. The larger the scale indicator number, the smaller the model, which means less detail can be shown.
A convenient way to think about scales is to work out how many millimetres represent one metre at a particular scale. This is achieved by dividing 1000 by the scale indicator number. For a scale of 1:50 divide 1000 by 50, the answer being 20. Therefore one metre in real life will be represented by 20mm on the model. Subsequently if the area you need to model is 5 metres by 7 metres, your 1:50 scale model would actually measure 100mm x 140mm – increase the scale to a ratio of 1:20 and the model would increase to an actual size of 250mm x 350mm. If possible it is always useful to use entourage in your model to enhance that sense of scale; these figures can be purchased from modelling and hobby shops.

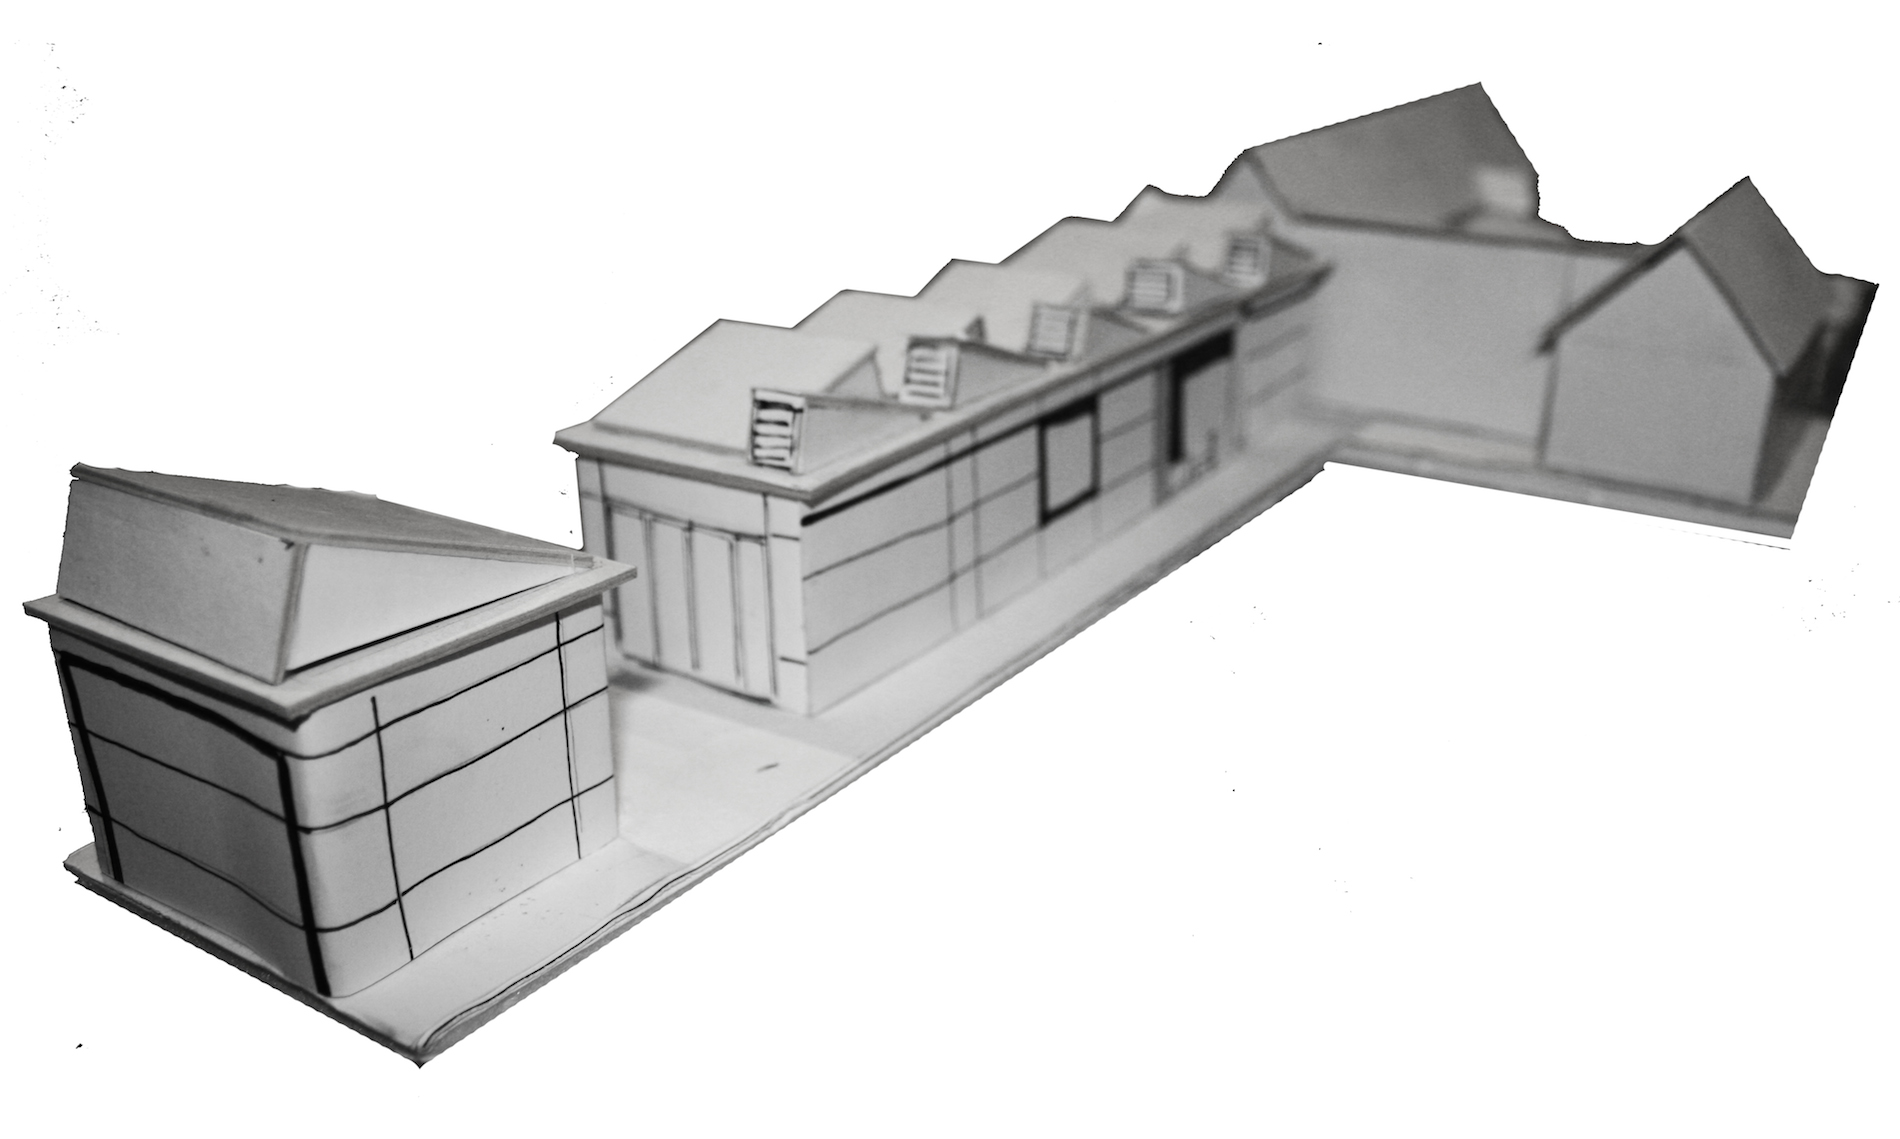
The model above expresses the relationship between the original heritage property and a new addition which clearly illustrates the juxtaposition of the roof structures
What scale should be used?
Once you have decided what the model needs to represent the next step is to work out what scale is required, this will be determined by the size of the area that you need to model, and secondly by the level of detail you need to show. If the purpose of the model is to show just the building you may contemplate a scale of 1:200 or 1:100. At these scales you can clearly indicate details such as doors and windows, verandas and landscape design. Conversely, if your goal is to clarify a specific area or detailed component of the building or interior you would benefit from a larger scale, perhaps 1:50 or By employing the use of a smaller scale you will avoid the model becoming too big to be practical, but you will be unable to show much in the way of detail.
Architectural model making methods and materials
White models don’t have to be highly detailed, they’re not supposed to be works of art, they are merely a tool for the designer or client to work through a concept, evaluate an idea or to show a relationship of a particular piece to its surroundings. Not only are they of benefit in the presentation of a scheme to the client they are invaluable in the design process, extensive and fluid ideas benefit by having to work on something small, intricate and precisely defined. They offer the designer assistance in developing and understanding the narrative to a large space or the ability to fine tune those more intricate of details.
Some of the basics that you will require are; white PVA glue, white card, foam board, balsa wood, a sharp craft knife, metal ruler or straight edge, scale rule, propelling pencil and Cutting mat.
It is useful to have a collection of White card, depending on the scale of your model you can play around with different thicknesses of material where appropriate.
To enhance the general appearance of your model ground it on a neat, solid base with a clean cut edges, starting with a drawn floor plan will expedite the build process. To achieve a clean finish when cutting your card or foam board it is preferable to make several shallow cuts rather than trying to score through the material in a single attempt, it will result in a safer, neater and more accurate outcome. Cutting boards are essential and often come with a grid pattern to assist in cutting your material squarely, otherwise a set square can be used. Always cut with a metal rule; never use a plastic scale rule for this purpose. Art shops, hardware stores, office stationers and even recycling centres can provide the necessary equipment and resources to get your project off the ground.


